How to Build a Kitchen Island
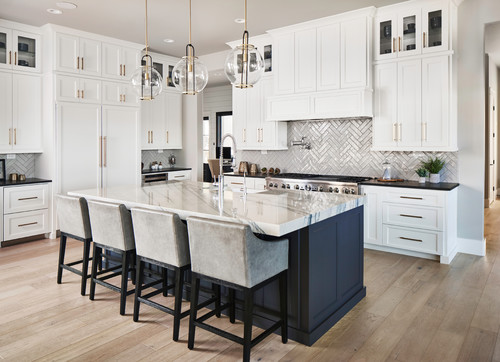
Are you looking to create more functional space in your kitchen? A kitchen island is the perfect solution. In this blog, we will explore how to build a kitchen island from scratch. We’ll discuss building a kitchen island, the materials needed, and the process to follow. By following these simple steps, you’ll be able to build a kitchen island that adds functionality and style to your kitchen.
Planning and Designing Your Kitchen Island
A well-planned and designed kitchen island can significantly enhance the functionality and aesthetics of your kitchen. In this section, we will provide a detailed and professional guide on how to build a kitchen island that suits your needs and preferences.
- Determine the Purpose and Function: Before building a kitchen island, consider its primary purpose and function. This will help you decide on the size, shape, storage, and countertop materials. Some common functions of kitchen islands include:
- Additional workspace
- Casual dining area
- Cooking and food prep station
- Storage for kitchen appliances and utensils
- Assess Your Kitchen Layout: To build a kitchen island that fits seamlessly into your existing space, assess your kitchen layout. Consider factors such as traffic flow, available floor space, and proximity to appliances. Keep in mind the “kitchen work triangle,” which connects the sink, stove, and refrigerator, when planning your island’s location.
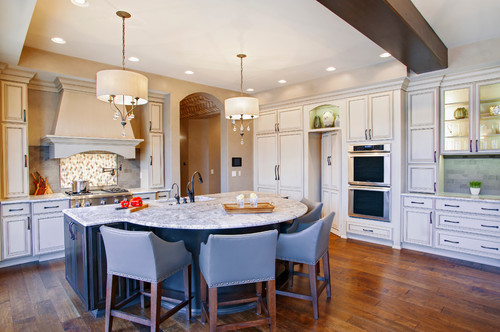
- Size and Shape: When deciding on the size and shape of your kitchen island, consider the available floor space and the desired function. The ideal size should allow for at least 36-48 inches of clearance around all sides of the island for easy movement. Common shapes for kitchen islands include:
- Rectangular: Most popular and versatile shape
- Square: Suitable for smaller kitchens or as a complement to a larger island
- L-shaped: Great for dividing the workspace and dining area
- T-shaped: Provides extra seating and dining space
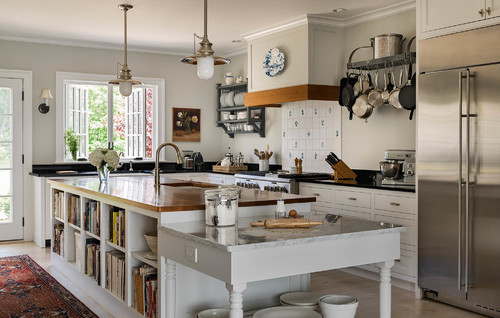
- Storage Options: To build a kitchen island that maximizes storage, consider incorporating a mix of cabinets, drawers, open shelves, and pull-out trays. Some popular storage ideas include:
- Deep drawers for pots and pans
- Cabinets with adjustable shelves for various-sized items
- Open shelves for displaying cookbooks and decorative items
- Pull-out trays for easy access to utensils and appliances
- Countertop Materials: When building a kitchen island, the choice of countertop material is essential for both functionality and aesthetics. Some popular countertop materials are:
- Granite: Durable, heat-resistant, and available in various colors
- Quartz: Low-maintenance, scratch-resistant, and non-porous
- Butcher block: Warm, natural look and perfect for food prep
- Laminate: Budget-friendly and available in a wide range of designs
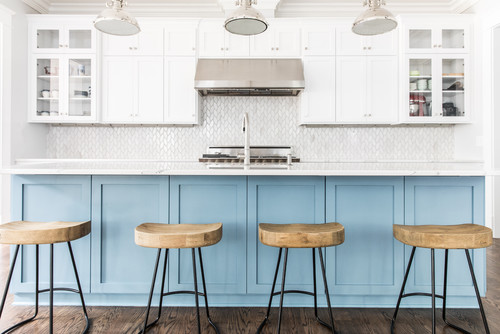
- Seating Arrangements: Adding seating to your kitchen island can create a welcoming space for casual dining and socializing. When planning seating, consider:
- The number of seats: Typically, allow for 24 inches of width per seat
- Seat height: Choose between barstool (28-30 inches) or counter-height (24-26 inches) seating
- Overhang: Allow for a 12-15 inch overhang for comfortable legroom
- Electrical Outlets and Lighting: To build a functional kitchen island, plan for electrical outlets and lighting. Incorporate outlets on the sides or within pop-up compartments for easy access. For lighting, consider pendant lights, recessed lighting, or under-cabinet lighting to illuminate your workspace.
By carefully planning and designing your kitchen island, you can create a functional, stylish, and personalized space that meets your needs and enhances your kitchen’s overall appeal.
Gathering Materials and Tools for Your Kitchen Island
In this section, we will provide a detailed and professional guide on gathering the necessary materials and tools for building a kitchen island. Having the right materials and tools at hand will ensure a smooth construction process and a successful end result.
- Lumber and Plywood: Select high-quality lumber and plywood for building a kitchen island that is sturdy and durable. Common choices include:
- Hardwood: Oak, maple, or cherry for a robust and attractive appearance
- Plywood: A more budget-friendly option, suitable for painting or veneering
- MDF (Medium Density Fiberboard): An affordable option, great for painted finishes
- Screws, Nails, and Fasteners: To build a kitchen island that is stable and secure, use appropriate screws, nails, and fasteners. Some options include:
- Wood screws: For joining wooden parts together
- Finish nails: For attaching trim and molding
- Pocket hole screws: For creating strong, hidden joints
- Wood Glue: A high-quality wood glue is essential for creating strong and lasting bonds when building a kitchen island. Choose a glue that is suitable for your chosen wood type and resistant to moisture.
- Paint or Stain: Select a paint or stain that matches your kitchen’s existing color scheme and style. Some factors to consider when choosing a finish are:
- Durability: Opt for a finish that can withstand daily wear and tear
- Easy maintenance: Choose a finish that can be easily cleaned and touched up if needed
- Compatibility: Ensure the paint or stain is suitable for your chosen wood type
- Countertop Material: As mentioned in Section 1, the countertop material plays a significant role in the functionality and aesthetics of your kitchen island. Choose a material that complements your kitchen’s design and meets your functional requirements.
- Basic Tools: To build a kitchen island, you’ll need a range of essential tools. Some of the basic tools required include:
- Tape measure: For accurate measurements of your materials
- Circular saw or table saw: For cutting lumber and plywood to size
- Miter saw: For making precise angled cuts
- Drill and drill bits: For creating holes and driving screws
- Pocket hole jig: For creating hidden joints
- Level: To ensure your island is level and plumb
- Sandpaper and/or orbital sander: For smoothing surfaces before finishing
- Paintbrushes and/or rollers: For applying paint or stain
- Safety Equipment: When building a kitchen island, prioritize safety by using proper protective gear. Some essential safety equipment includes:
- Safety glasses: To protect your eyes from debris
- Ear protection: To safeguard your hearing while using power tools
- Gloves: To protect your hands from splinters and sharp edges
- Dust mask: To prevent inhalation of dust particles
By gathering the necessary materials and tools, you’ll be well-prepared to start building a kitchen island that meets your needs and enhances the functionality and style of your kitchen.
Constructing the Base of Your Kitchen Island
In this section, we will provide a detailed and professional guide on constructing the base of your kitchen island. Building a strong and sturdy base is crucial for the stability and longevity of your island.
- Measure and Cut the Lumber: Begin by measuring and cutting the lumber for the frame of your kitchen island base. Use a tape measure and circular saw or table saw to cut the pieces to size. The frame typically consists of:
- Vertical posts: These will serve as the legs of your island
- Horizontal rails: These will connect the vertical posts and provide support for the frame
- Assemble the Frame: Once the lumber is cut, assemble the frame using wood screws and wood glue. A pocket hole jig can be used to create hidden joints for a cleaner look. Follow these steps to build a kitchen island frame:
- Attach the horizontal rails to the vertical posts, ensuring the joints are square
- Use wood screws and wood glue for added strength
- Check for squareness as you proceed, adjusting as needed
- Attach Plywood Panels: After the frame is assembled, cut plywood panels to size and attach them to the frame for added stability. This step will also create a solid surface for attaching cabinets or shelves later on. To attach the plywood panels:
- Measure and cut the plywood to size using a circular saw or table saw
- Apply wood glue to the edges of the frame where the plywood will attach
- Secure the plywood panels to the frame using wood screws, countersinking the screws for a cleaner finish
- Install the Toe Kick: A toe kick is a recessed area at the base of your kitchen island that allows for more comfortable standing while working at the island. To build a kitchen island with a toe kick, follow these steps:
- Measure and cut a piece of plywood or MDF for the toe kick, typically 3-4 inches high and the same length as the front of your island base
- Attach the toe kick to the bottom front of the island base using wood glue and screws
- Finish the toe kick with paint or stain to match the rest of your island
- Reinforce the Frame: To build a kitchen island with a strong and stable base, add additional support to the frame as needed. This may include:
- Installing horizontal braces between the vertical posts for extra support
- Adding corner brackets or metal braces to strengthen joints
By following these steps, you will create a sturdy and durable base for your kitchen island, ensuring it can support the weight of the countertop and withstand daily use.
Incorporating Storage and Shelving into Your Kitchen Island
In this section, we will provide a detailed and professional guide on incorporating storage and shelving into your kitchen island. Adding storage solutions will maximize the functionality of your island and help keep your kitchen organized and clutter-free.
- Choose Your Storage Options: Before building your storage solutions, decide which types of storage will best suit your needs. Some popular options include:
- Cabinets: Provide concealed storage for a clean and organized look
- Drawers: Ideal for smaller items, utensils, and appliances
- Open shelves: Perfect for displaying cookbooks, decorative items, or frequently used items
- Pull-out trays: Allow for easy access to appliances or larger items
- Measure and Cut Storage Components: Once you’ve chosen your storage options, measure and cut the necessary components using a circular saw or table saw. This may include:
- Cabinet or drawer box sides, tops, and bottoms
- Drawer fronts and cabinet doors
- Open shelves or pull-out trays
- Assemble Storage Units: After cutting the components, assemble your storage units. Follow these steps for building a kitchen island with storage:
- For cabinets and drawers, assemble the boxes using wood glue and screws, ensuring they are square
- Attach drawer slides to the drawer boxes and the inside of the island frame, following the manufacturer’s instructions
- Install cabinet hinges on the cabinet doors and the island frame, if applicable
- Install Storage Units onto the Base: With your storage units assembled, install them onto the base of your kitchen island. To build a kitchen island with storage, follow these guidelines:
- Secure cabinets to the island frame using screws, ensuring they are level and plumb
- Slide the drawers into place on their drawer slides, adjusting as needed for smooth operation
- Install open shelves or pull-out trays, ensuring they are level and securely fastened
- Add Hardware and Finishing Touches: Once your storage units are installed, add hardware and finishing touches to complete the look. This may include:
- Installing handles or knobs on cabinet doors and drawers
- Adding decorative trim or molding to the edges of open shelves
- Applying paint or stain to match the island base
By incorporating storage and shelving into your kitchen island, you will create a practical and functional space that helps keep your kitchen organized and efficient.
Installing the Countertop on Your Kitchen Island
In this section, we will provide a detailed and professional guide on installing the countertop on your kitchen island. The countertop not only adds to the visual appeal of your island but also serves as a functional workspace for various kitchen tasks.
- Select Your Countertop Material: As mentioned in previous sections, your choice of countertop material is essential for both functionality and aesthetics. Choose a material that complements your kitchen’s design and meets your functional requirements. Some popular materials include granite, quartz, butcher block, and laminate.
- Measure and Cut the Countertop: Once you’ve chosen your countertop material, measure and cut it to size. Ensure the countertop has a slight overhang (approximately 1 inch) on all sides to protect the island base and provide a comfortable work surface. To cut your countertop:
- Mark the required dimensions on the countertop material using a straight edge and a pencil
- Use a circular saw, jigsaw, or a specialized cutting tool (depending on the material) to make the cuts
- Smooth the edges using sandpaper or a specialized tool for your chosen material
- Cut Out Any Openings: If your kitchen island design includes a sink, cooktop, or other built-in features, you will need to cut openings in the countertop to accommodate them. Follow the manufacturer’s instructions for the required dimensions and use the appropriate cutting tools for your chosen countertop material.
- Prepare the Island Base: Before installing the countertop, prepare the island base by ensuring it is clean, level, and stable. Add additional supports if needed, such as corner braces or wooden cleats, to provide a secure foundation for the countertop.
- Install the Countertop: With the countertop cut to size and the island base prepared, follow these steps to build a kitchen island with a professionally installed countertop:
- Apply a bead of construction adhesive or silicone caulk to the top edges of the island base
- Carefully lift and position the countertop onto the island base, aligning it correctly and ensuring an even overhang on all sides
- Press down firmly to secure the countertop in place, wiping away any excess adhesive or caulk with a damp cloth
- If your countertop material requires it, secure the countertop to the island base using screws or other appropriate fasteners
- Seal and Finish the Countertop: To protect your countertop and ensure its longevity, apply the appropriate sealant or finish according to the manufacturer’s instructions. This step is particularly important for porous materials like granite or butcher block, which may require periodic resealing.
By following these steps, you will install a beautiful and functional countertop on your kitchen island, enhancing its appearance and usability.
Adding Seating, Electrical Outlets, Lighting, and Ventilation to Your Kitchen Island
In this section, we will provide a detailed and professional guide on adding seating, electrical outlets, lighting, and ventilation to your kitchen island. These features will enhance the functionality, comfort, and aesthetics of your island, making it a versatile and enjoyable space for cooking, dining, and entertaining.
- Seating: Adding seating to your kitchen island can transform it into a casual dining area or a comfortable spot for socializing. When selecting seating for your island, consider the following factors:
- Height: Choose barstools or chairs that are the appropriate height for your island’s countertop
- Style: Select seating that complements the design of your kitchen and island
- Comfort: Opt for comfortable seating with appropriate back support and cushioning
- Space: Ensure there is enough space between seats for comfortable movement and legroom
- Electrical Outlets: Integrating electrical outlets into your kitchen island is essential for convenience and functionality. Outlets provide power for small appliances and charging electronic devices. To build a kitchen island with electrical outlets, consider these tips:
- Hire a licensed electrician to ensure safe and code-compliant installation
- Install outlets on the sides or back of the island to maintain a clean appearance
- Opt for tamper-resistant or GFCI outlets for added safety
- Consider pop-up outlets for a sleek and unobtrusive option
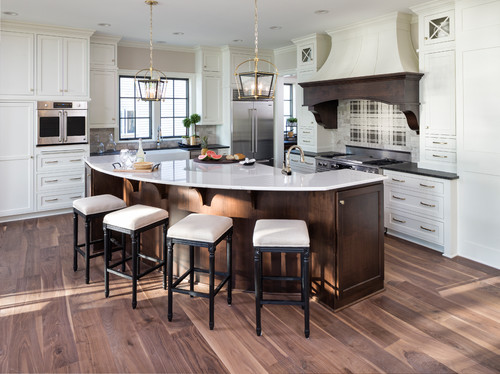
- Lighting: Proper lighting is crucial for creating a safe and inviting atmosphere around your kitchen island. Incorporate both task and ambient lighting to enhance the usability and ambiance of the space. Some lighting options to consider are:
- Pendant lights: Suspended over the island, these provide both task and ambient lighting while adding a decorative touch
- Recessed lights: Installed in the ceiling, these provide even illumination for the entire island
- Under-cabinet lights: Mounted under the island’s countertop, these provide focused task lighting for food preparation and other tasks
- Ventilation: If your kitchen island includes a cooktop, it’s essential to install proper ventilation to remove smoke, odors, and steam. To build a kitchen island with effective ventilation, consider these options:
- Island range hood: A standalone hood that is suspended above the cooktop, designed specifically for kitchen islands
- Downdraft ventilation: A discreet system installed behind or beside the cooktop that pulls smoke and odors downward, ideal for maintaining an open-concept feel
By incorporating seating, electrical outlets, lighting, and ventilation into your kitchen island, you will create a versatile, functional, and comfortable space for cooking, dining, and entertaining. Your kitchen island will not only serve as a practical workspace but also as the centerpiece of your kitchen, enhancing the overall aesthetics and enjoyment of the room.
Finishing Touches and Maintaining Your Kitchen Island
In this final section, we will provide a detailed and professional guide on adding finishing touches to your kitchen island and maintaining it to ensure its longevity and functionality. By taking care of your island and keeping it in top condition, you will continue to enjoy its benefits for years to come.
- Painting or Staining: Applying a high-quality paint or stain to your kitchen island will enhance its appearance and protect the underlying material. When choosing a finish, consider the following:
- Color: Select a color that complements your kitchen’s design and other cabinetry
- Durability: Opt for a durable finish that can withstand daily use, such as oil-based paint or polyurethane for wooden islands
- Application: Follow the manufacturer’s instructions for the best results, using a brush, roller, or sprayer for even coverage
- Installing Backsplash: Adding a backsplash to your kitchen island can protect the wall behind it from splashes and spills while also adding visual interest. To build a kitchen island with a backsplash, consider these options:
- Tile: Available in various materials, colors, and patterns, tile can be arranged in a multitude of designs to create a unique look
- Stone: Natural or engineered stone can add a luxurious touch and complement your countertop material
- Metal: Stainless steel or other metals can create a sleek, modern look that is easy to clean
- Accessorizing Your Kitchen Island: Once your island is complete, add accessories to enhance its functionality and aesthetics. Some accessory ideas include:
- Decorative items: Vases, fruit bowls, or other decorative pieces can add visual interest and personality to your island
- Organizers: Utensil holders, spice racks, or drawer organizers can help keep your island tidy and efficient
- Cutting boards: Choose a high-quality cutting board that complements your countertop and provides a dedicated food preparation area
- Maintaining Your Kitchen Island: Proper maintenance is essential for ensuring the longevity of your kitchen island. Follow these tips to keep your island in top condition:
- Regular cleaning: Wipe down the island’s surfaces with a damp cloth and mild detergent to remove dirt and grime
- Countertop care: Follow the manufacturer’s instructions for maintaining your countertop material, such as resealing granite or oiling butcher block
- Hardware maintenance: Periodically tighten any loose hardware, such as handles or hinges, to ensure your island remains stable and functional
By adding finishing touches and maintaining your kitchen island, you will create a beautiful, functional, and long-lasting centerpiece for your kitchen. By following this comprehensive guide on how to build a kitchen island, you have learned the necessary steps and considerations for creating a custom island that enhances the functionality and aesthetics of your space. Enjoy your new kitchen island and the countless benefits it provides.
Troubleshooting and Common Issues with Kitchen Islands
In this section, we will provide a detailed and professional guide on troubleshooting and addressing common issues that may arise with your kitchen island. By being aware of potential problems and knowing how to address them, you can ensure that your island remains functional, safe, and visually appealing.
- Uneven Countertop or Wobbling Island: If your kitchen island is wobbling or the countertop appears uneven, consider these troubleshooting tips:
- Check the island’s base and legs for any loose connections, tightening screws or bolts as necessary
- Adjust the leveling feet (if installed) to ensure the island sits level on the floor
- Use a long level to check the countertop’s flatness, sanding or planing any high spots if necessary
- Drawer or Cabinet Door Alignment Issues: To fix misaligned drawers or cabinet doors on your kitchen island, follow these steps:
- Loosen the screws on the drawer slides or cabinet hinges, adjusting the position as needed to ensure proper alignment
- Check for any warped or twisted components, replacing them if necessary
- Ensure that the island’s frame is square and level, making any necessary adjustments to the base or supports
- Water Damage or Stains on Wooden Components: If you notice water damage or stains on your wooden kitchen island, consider these solutions:
- Regularly reseal or oil wooden countertops and other components to prevent moisture penetration
- Wipe up spills immediately to prevent staining
- Refinish or paint damaged areas as needed, sanding the surface before applying a new coat of paint or stain
- Poor Lighting or Inadequate Ventilation: To address poor lighting or inadequate ventilation around your kitchen island, consider the following:
- Install additional lighting, such as pendant lights, recessed lights, or under-cabinet lights, to improve illumination
- Ensure that your island’s cooktop is equipped with a properly functioning range hood or downdraft ventilation system
- Regularly clean and maintain your ventilation system, replacing filters and checking for any obstructions
- Cracks or Chips in Countertop Material: If your countertop develops cracks or chips, take the following steps:
- For minor chips or scratches, use a repair kit specifically designed for your countertop material, following the manufacturer’s instructions
- For more significant damage, consult a professional countertop installer for repair or replacement options
By addressing these common issues and troubleshooting any problems that arise, you can ensure that your kitchen island remains a functional, safe, and visually appealing centerpiece in your kitchen. Regular maintenance and timely repairs will help to extend the life of your island and keep it in top condition for years to come.
FAQs about How to Build a Kitchen Island
- Q: How much does it cost to build a kitchen island?
- A: The cost to build a kitchen island depends on factors such as size, materials, and the complexity of the design. A basic, freestanding island can cost as little as $500, while a custom-built island with high-end materials and features can exceed $10,000. The overall cost will depend on your budget, needs, and preferences.
- Q: How big should a kitchen island be?
- A: The ideal size for a kitchen island depends on the available space in your kitchen and your specific needs. A general rule of thumb is to allow at least 36-48 inches of clearance around the island for comfortable movement and workflow. A typical kitchen island ranges from 24-48 inches in width and 48-96 inches in length.
- Q: What materials are best for a kitchen island countertop?
- A: The best materials for a kitchen island countertop depend on your preferences, budget, and the intended use of the island. Some popular choices include granite, quartz, butcher block, and laminate. Each material has its own advantages and disadvantages in terms of durability, maintenance, and aesthetics.
- Q: Do I need a building permit to construct a kitchen island?
- A: Building permit requirements for constructing a kitchen island vary depending on your local building codes and the scope of the project. Generally, small, freestanding islands may not require a permit, while larger, built-in islands with plumbing or electrical work may require a permit. It’s essential to check with your local building department for specific requirements and guidelines.
- Q: Can I build a kitchen island with a sink or cooktop?
- A: Yes, you can build a kitchen island with a sink or cooktop, but you will need to consider the necessary plumbing and electrical work involved. It’s important to hire a licensed plumber or electrician to ensure the proper installation of these features, and you may need a building permit for this type of project.
- Q: How do I add storage to my kitchen island?
- A: You can add storage to your kitchen island by incorporating features such as cabinets, drawers, shelves, and racks. The type and amount of storage will depend on your specific needs and the size of your island. Consider your storage needs, such as pots and pans, utensils, and small appliances, when designing your island’s storage solutions.
- Q: How do I maintain my kitchen island?
- A: To maintain your kitchen island, regularly clean its surfaces using a damp cloth and mild detergent, reseal or oil the countertop as necessary, and periodically tighten any loose hardware. Additionally, ensure proper ventilation and lighting around the island to create a safe and comfortable workspace. Proper maintenance will help extend the life of your kitchen island and keep it in top condition.