How to Finish Kitchen Cabinets Yourself
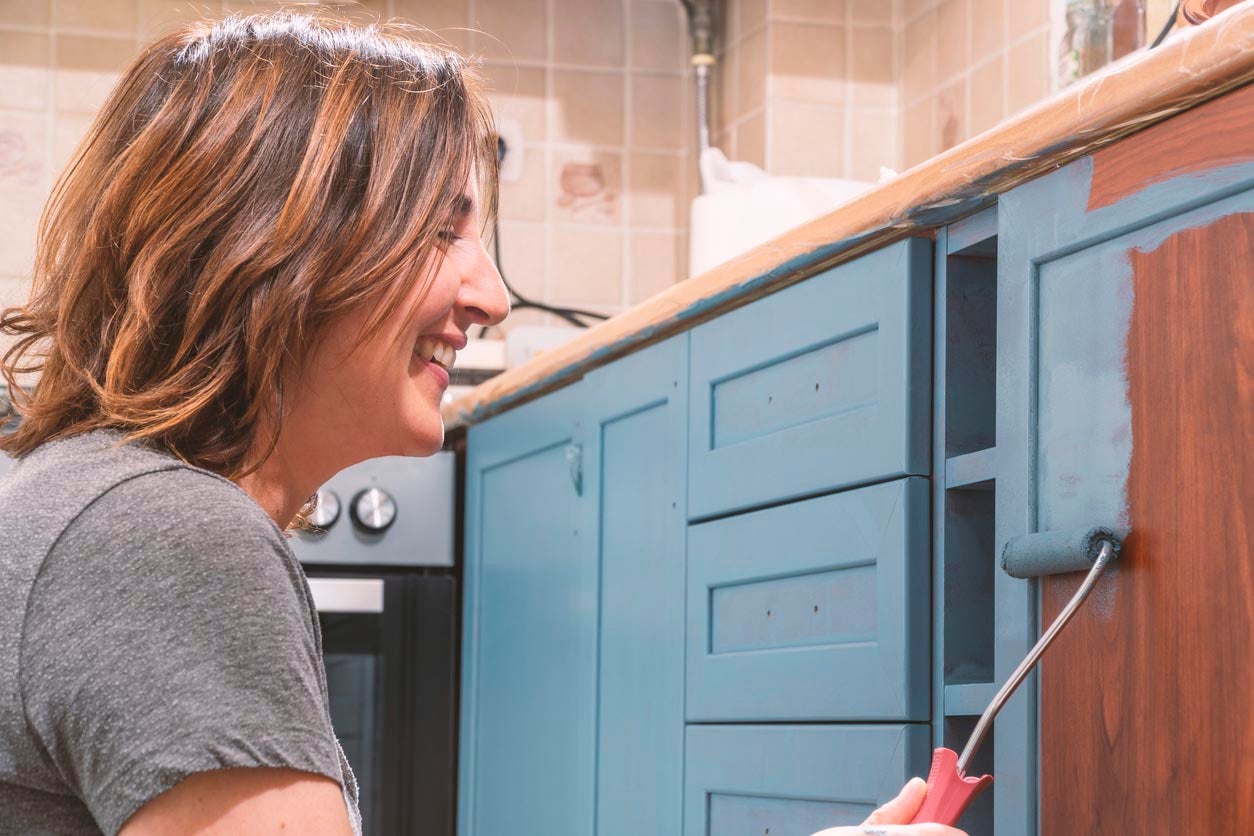
Finishing kitchen cabinets yourself can be a great way to save money while adding a personal touch to your kitchen. It can also be a fun and rewarding DIY project. However, it’s important to take the time to do it right in order to achieve a professional-looking finish that will stand up to daily use. In this article, we’ll go through the steps you need to follow to finish kitchen cabinets yourself.
Introduction
A well-designed and functional kitchen is the heart of every home, and one of its most essential components is the cabinetry. Kitchen cabinets not only provide storage solutions but also contribute significantly to the overall aesthetics of the space. Over time, cabinets may lose their luster due to wear and tear, or you may simply desire a change in their appearance. In either case, refinishing your kitchen cabinets can be a cost-effective and rewarding home improvement project.
Finishing kitchen cabinets yourself is a viable option for homeowners looking to refresh their kitchens without breaking the bank. This DIY approach can save you a considerable amount of money compared to hiring a professional, and it allows you to exercise your creativity, customizing the appearance to your liking.
This comprehensive guide will walk you through the process of kitchen cabinets finishing, from selecting the right materials and tools to applying the chosen finish and reassembling the cabinets. By following the outlined steps, you will be able to achieve a professional-quality result that enhances the beauty and functionality of your kitchen space.
Before embarking on this DIY project, it is essential to have a clear understanding of the kitchen cabinets finishing process. This involves preparing the cabinets by cleaning and sanding their surfaces, applying the desired finish (such as paint, stain, or varnish), and, finally, reassembling the cabinets with their hardware. Each of these steps is critical in ensuring a successful outcome, so it is important to approach the project with patience and attention to detail.
In the subsequent sections, we will delve deeper into the specifics of choosing the appropriate materials and tools, preparing the cabinets, applying the finish, and maintaining your newly refinished cabinets. By following this guide, you will be well-equipped to tackle your kitchen cabinet refinishing project with confidence and finesse.
Choosing the Right Materials and Tools
A well-executed kitchen cabinet refinishing project hinges on selecting the right materials and tools. This section will guide you through the process of choosing the appropriate finish and tools, as well as assessing your cabinet material for compatibility.
A. Types of finishes
- Paint
- Paint is an excellent choice for homeowners who want to change the color of their cabinets or create a more modern look. When selecting paint, opt for high-quality acrylic or enamel paint, specifically formulated for cabinetry or wood surfaces. These paints offer greater durability, a smoother finish, and are easier to clean.
- Stain
- Stains are ideal for enhancing the natural wood grain of your cabinets while providing a protective layer. They come in various shades, allowing you to achieve a specific look that complements your kitchen’s design. Look for wood stains with a built-in sealant, as this simplifies the kitchen cabinets finishing process and saves time.
- Varnish
- Varnish provides a clear, protective finish that highlights the natural beauty of wood. It is available in a range of sheens, from matte to high gloss. Varnishes can be oil-based or water-based, with the latter offering a faster drying time and easier cleanup. Note that varnish alone may not provide sufficient protection for kitchen cabinets and may need to be used in conjunction with a stain or sealer.
- Polyurethane
- Polyurethane is a durable, clear finish that offers excellent protection against wear and tear, moisture, and heat. It is available in water-based and oil-based formulations and comes in various sheens. Polyurethane is a popular choice for sealing stained cabinets, as it provides a long-lasting protective layer.
B. Selecting the right tools
- Brushes
- Choose high-quality synthetic or natural bristle brushes that are appropriate for your chosen finish. A 2-3 inch angled brush works well for most cabinet surfaces, while a 1-inch brush is suitable for detailed areas and edges.
- Rollers
- Foam rollers are ideal for applying paint or clear finishes, as they provide a smooth, even coat with minimal brush marks. Select a small to medium-sized roller for easier maneuverability on cabinet surfaces.
- Sandpaper
- You’ll need various grits of sandpaper to prepare the cabinets for finishing and to sand between coats. Start with a coarser grit (e.g., 120-grit) for initial sanding and progress to finer grits (e.g., 220-grit) for subsequent sanding steps.
- Paint trays
- Use paint trays for holding your chosen finish while you work. Look for trays with liners or disposable inserts for easier cleanup.
- Drop cloths
- Protect your floors and countertops with drop cloths or plastic sheeting while you work. This will catch any drips or spills and make cleanup much easier.
- Tack cloth
- Tack cloths are essential for removing dust and debris from the cabinet surfaces before applying the finish. This ensures a smooth, professional result.
- Gloves and safety goggles
- Wear gloves to protect your hands from chemicals and stains, and safety goggles to shield your eyes from potential splashes.
C. Assessing your cabinet material and its compatibility with your chosen finish
Before selecting a finish, examine your cabinets to determine the type of material. Most cabinets are made from solid wood, plywood, MDF, or particleboard. Each material requires specific considerations when selecting a finish:
- Solid wood and plywood: These materials work well with all types of finishes, including paint, stain, varnish, and polyurethane. Consider the wood species and grain pattern when choosing a stain color or paint shade.
- MDF: Medium-density fiberboard (MDF) is a composite material that accepts paint well but is not suitable for staining, as it lacks a natural wood grain pattern. Before painting MDF, ensure you apply a high-quality primer to seal the surface and prevent paint absorption.
- Particleboard: Similar to MDF, particleboard does not take stain well due to its composition. Painting is the best option for particleboard cabinets, but a good primer is essential to create a smooth, even surface for paint application.
When selecting a finish, also consider factors such as your kitchen’s design, the desired level of protection, and maintenance requirements. Ultimately, the choice of finish should align with your personal preferences and the unique characteristics of your cabinets.
In conclusion, carefully choosing the right materials and tools is crucial for achieving professional-quality results in your DIY kitchen cabinet refinishing project. By assessing your cabinet material, selecting an appropriate finish, and gathering the necessary tools, you’ll be well-prepared to tackle the next steps in the refinishing process.
Preparing the Cabinets for Finishing
Proper preparation is crucial for achieving a flawless finish on your kitchen cabinets. This section will guide you through the essential steps for preparing your cabinets, ensuring they are ready for the application of your chosen finish.
A. Removing cabinet doors and hardware
- Begin by emptying your cabinets and drawers to prevent damage to the contents during the refinishing process.
- Carefully remove cabinet doors, using a screwdriver or drill to detach them from their hinges. Be sure to keep track of all screws and hardware to facilitate reassembly later.
- Remove all hardware, including handles, knobs, and hinges, from the doors and drawers. Store these items in a labeled container to avoid misplacement.
- If possible, set up a designated workspace for refinishing the cabinet doors and drawers, preferably in a well-ventilated area.
B. Cleaning and degreasing the cabinets
- Thoroughly clean all cabinet surfaces, including doors, drawers, and frames, using a solution of warm water and mild detergent or a commercial degreasing agent. This step is crucial for removing accumulated grease, grime, and dust, ensuring a smooth surface for the application of the finish.
- Rinse the surfaces with clean water to remove any residual detergent, then dry them thoroughly with a clean, lint-free cloth.
- Allow the cabinets to air dry completely before proceeding to the next step.
C. Sanding the surfaces
- Using the correct sandpaper grit:
- Start with a coarser grit sandpaper (e.g., 120-grit) for initial sanding.
- Progress to a finer grit (e.g., 220-grit) for subsequent sanding steps and between coats of finish (if needed).
- Proper sanding technique:
- Sand cabinet surfaces in the direction of the wood grain to prevent scratches and maintain a consistent appearance.
- Apply even pressure when sanding, avoiding excessive force that may cause damage to the cabinets.
- Pay special attention to edges, corners, and any detailed or raised areas, ensuring they are smooth and free of defects.
D. Wiping down the surfaces with a tack cloth
- After sanding, use a tack cloth to remove all dust and debris from the cabinet surfaces. This step is essential for achieving a smooth, professional-looking finish.
- Be thorough in your inspection, ensuring no dust or particles remain on the surfaces before applying the finish.
E. Applying a primer (if necessary)
- If you are painting your cabinets, applying a high-quality primer is essential. This will provide a smooth, even base for the paint, ensuring better adhesion and durability.
- Choose a primer that is compatible with your chosen paint type (e.g., water-based or oil-based). Consult the paint manufacturer’s recommendations if you are unsure.
- Apply the primer using a brush or roller, following the manufacturer’s instructions for application and drying time.
- Once the primer is dry, lightly sand the surfaces with fine-grit sandpaper (e.g., 220-grit) to remove any imperfections and create a smooth finish. Wipe down the surfaces with a tack cloth to remove any dust before proceeding with the paint application.
By following these detailed steps to prepare your cabinets for finishing, you will lay the foundation for a successful refinishing project. Proper preparation is essential for achieving a professional-quality result that will enhance the beauty and functionality of your kitchen.

Applying the Chosen Finish
Once your cabinets are adequately prepared, it’s time to apply your chosen finish. This section will provide detailed guidance on applying paint, stain, and varnish or polyurethane finishes for a professional, long-lasting result.
A. Paint
- Selecting the right paint type:
- Choose a high-quality acrylic or enamel paint specifically formulated for cabinetry or wood surfaces. These paints offer greater durability, a smoother finish, and are easier to clean.
- Consider factors such as the desired sheen (matte, satin, semi-gloss, or gloss) and the kitchen’s overall color scheme when selecting your paint.
- Using a brush or roller:
- For smaller or detailed areas, use a high-quality synthetic or natural bristle brush that is appropriate for your chosen paint type.
- For larger surfaces, use a foam roller for a smooth, even application with minimal brush marks.
- Applying multiple coats:
- Apply the first coat of paint using long, even strokes or rolling motions, ensuring full coverage of the surface.
- Allow the paint to dry according to the manufacturer’s recommended drying time.
- Lightly sand the surfaces with a fine-grit sandpaper (e.g., 220-grit) to remove any imperfections and promote adhesion for the subsequent coat. Wipe down the surfaces with a tack cloth to remove dust.
- Apply a second coat of paint, following the same application technique as the first coat. Repeat the process for additional coats as needed, ensuring adequate drying time between each coat.
- Drying time:
- Follow the manufacturer’s recommendations for drying time between coats and before reassembling the cabinets.
- Generally, allow at least 24 hours for the paint to cure fully before reattaching doors and hardware.
B. Stain
- Choosing the right stain color:
- Consider your kitchen’s overall design and the type of wood when selecting a stain color.
- Test the stain on a small, inconspicuous area or a sample piece of wood to ensure the desired color and appearance.
- Applying the stain evenly:
- Use a clean, lint-free cloth or a high-quality brush to apply the stain in the direction of the wood grain.
- Work in small sections to prevent the stain from drying too quickly and becoming uneven.
- Wiping off excess stain:
- After allowing the stain to penetrate the wood for the recommended time (usually a few minutes), use a clean cloth to wipe off any excess stain, again following the direction of the wood grain.
- This step ensures an even color and prevents blotchiness or streaks.
- Drying time:
- Follow the manufacturer’s recommendations for drying time between coats (if needed) and before applying a protective topcoat, such as polyurethane.
- Generally, allow at least 24 hours for the stain to dry fully before proceeding with the next step.
C. Varnish or Polyurethane
- Choosing between water-based and oil-based:
- Water-based finishes offer a faster drying time, easier cleanup, and lower VOC emissions.
- Oil-based finishes provide a richer, more durable finish but have longer drying times and higher VOC emissions.
- Consider factors such as drying time, ease of application, and desired appearance when selecting your finish.
- Application techniques:
- Use a high-quality brush or foam roller to apply the varnish or polyurethane, working in long, even strokes or rolling motions.
- Be sure to maintain a “wet edge” to avoid lap marks and ensure a smooth, even finish.
- Drying time:
- Follow the manufacturer’s recommendations for drying time between coats (if needed) and before reassembling the cabinets.
- Generally, allow at least 24 hours for the varnish or polyurethane to dry fully before proceeding with the next step.
- Sanding between coats (if needed):
- If your chosen finish requires multiple coats, lightly sand the surfaces with a fine-grit sandpaper (e.g., 320-grit) after each coat has dried, following the manufacturer’s recommendations.
- Sanding between coats promotes better adhesion and a smoother finish.
- After sanding, wipe down the surfaces with a tack cloth to remove any dust before applying the next coat of varnish or polyurethane.
By following these detailed steps for applying your chosen finish, you will achieve a professional-quality result that enhances the beauty and functionality of your kitchen cabinets. Each type of finish offers unique benefits and considerations, so be sure to select the one that best suits your needs and preferences. After your finish has fully cured, you can proceed with reassembling your cabinets and enjoying your newly refinished kitchen.
Reassembling the Cabinets
Once your chosen finish has fully cured, it’s time to reassemble your kitchen cabinets. This section provides detailed guidance on reattaching hardware, installing cabinet doors, adjusting hinges for proper alignment, and ensuring smooth operation of doors and drawers.
A. Reattaching hardware
- Retrieve the hardware (handles, knobs, and hinges) that you stored in a labeled container during disassembly.
- Inspect each piece of hardware for damage or excessive wear. Replace any damaged pieces as necessary.
- Using a screwdriver or drill, securely attach the handles and knobs to the cabinet doors and drawers.
B. Installing cabinet doors
- Begin by reattaching the hinges to the cabinet doors. Ensure that the hinges are correctly oriented and aligned with the pre-existing holes or markings.
- With the help of an assistant or using a support (e.g., a piece of wood or a cabinet jack), carefully position the cabinet door against the cabinet frame.
- Align the door with the frame, ensuring even spacing around all edges and proper placement relative to adjacent doors and drawers.
- Attach the hinges to the cabinet frame using the previously removed screws. Tighten the screws securely but avoid overtightening, which can cause damage or hinder door movement.
C. Adjusting hinges for proper alignment
- Once the cabinet doors are installed, check their alignment by opening and closing them. Ensure they are level and evenly spaced relative to the cabinet frame and adjacent doors.
- If the doors are not properly aligned, use the adjustment screws on the hinges to fine-tune their position. These screws typically control the door’s vertical, horizontal, and depth alignment.
- Make small adjustments and check the door’s alignment after each change. Repeat this process until the doors are perfectly aligned.
D. Ensuring smooth operation of doors and drawers
- Test the smoothness of the cabinet doors by opening and closing them several times. Ensure that they operate without binding or rubbing against the frame or adjacent doors.
- If necessary, apply a small amount of lubricant, such as silicone spray or graphite powder, to the hinge pivot points or drawer slides to ensure smooth operation.
- Check the operation of the drawers, making sure they slide in and out smoothly and close securely. Adjust the drawer slides as needed to correct any issues.
By following these detailed steps for reassembling your kitchen cabinets, you will ensure a professional, well-aligned result that complements the beauty of your newly refinished cabinets. Proper reassembly is vital for the smooth operation and longevity of your cabinets, so take the time to perform this process carefully and methodically. Once your cabinets are fully reassembled, you can enjoy your revitalized kitchen space.
Cleaning and Maintenance Tips
To keep your newly refinished kitchen cabinets looking their best and ensure their longevity, proper cleaning and maintenance are essential. This section provides detailed guidance on regular cleaning methods, addressing spills and stains, and maintaining the finish with periodic touch-ups.
A. Regular cleaning methods
- Dusting: Regularly dust your cabinets with a soft, lint-free cloth or microfiber duster to remove surface dust and prevent buildup. Gently wipe the surfaces in the direction of the wood grain or the direction of the finish.
- Cleaning: For more thorough cleaning, use a mild detergent mixed with warm water or a specially formulated wood cleaner. Moisten a soft, lint-free cloth with the cleaning solution and gently wipe the cabinet surfaces. Be sure not to saturate the wood or allow water to seep into joints or crevices.
- Drying: After cleaning, use a clean, dry cloth to remove any residual moisture from the cabinet surfaces. This step is crucial to prevent water damage and maintain the integrity of the finish.
B. Addressing spills and stains
- Act promptly: If a spill occurs, clean it up immediately to prevent staining or damage to the kitchen cabinets finishing. Use a soft, absorbent cloth to blot the spill, avoiding rubbing or scrubbing motions that may spread the spill or damage the finish.
- Cleaning solutions: For stubborn stains or spills, use a mild detergent mixed with warm water or a wood cleaner specifically designed for your kitchen cabinets finishing. Moisten a soft cloth with the solution and gently dab or wipe the affected area, following the direction of the wood grain or the finish.
- Rinsing and drying: After addressing spills or stains, rinse the area with a damp cloth to remove any residual cleaning solution, then dry the surface thoroughly with a clean, dry cloth.
C. Maintaining the finish with periodic touch-ups
- Assessing the finish: Periodically inspect your cabinets for signs of wear, damage, or fading. Pay particular attention to high-traffic areas or surfaces that are frequently touched, such as handles and edges.
- Touch-up materials: Use touch-up pens, markers, or kits specifically designed for your cabinet finish. These products are available in various colors and sheens to match your existing finish.
- Application: Follow the manufacturer’s instructions for applying the touch-up product to the affected area. Work carefully and precisely to avoid creating visible lines or inconsistencies in the finish.
- Sealing: If your touch-up product requires a protective topcoat, such as polyurethane, apply it according to the manufacturer’s instructions. This step ensures the touch-up’s durability and a consistent appearance with the surrounding finish.
By following these detailed cleaning and maintenance tips, you will preserve the beauty and durability of your newly refinished kitchen cabinets. Proper care and attention will extend the life of your cabinets and help maintain their appearance, allowing you to enjoy your revitalized kitchen for many years to come.
FAQs about Finishing Kitchen Cabinets Yourself
Q1: Can I finish my kitchen cabinets without removing the doors?
A1: While it is possible to finish your cabinets without removing the doors, it is not recommended. Removing the doors provides easier access to all surfaces and allows for a more even and professional-looking result. It also prevents paint, stain, or varnish from getting onto your cabinet’s hardware.
Q2: How long does it take to refinish kitchen cabinets?
A2: The time it takes to refinish kitchen cabinets depends on various factors, such as the size of your kitchen, the type of finish you choose, and the number of coats required. Generally, the entire process can take several days to a week, including prep work, drying time between coats, and reassembly.
Q3: Is it better to paint or stain kitchen cabinets?
A3: Whether to paint or stain your kitchen cabinets depends on your personal preference, desired appearance, and the type of wood your cabinets are made from. Paint provides a more uniform color and can be used to achieve a contemporary look, while stain enhances the natural wood grain and offers a more traditional appearance. Consider your kitchen’s overall design and your preferences when deciding between paint and stain.
Q4: How can I avoid brush strokes when painting my kitchen cabinets?
A4: To avoid brush strokes, use a high-quality brush or foam roller designed for the type of paint you are using. Apply thin, even coats of paint, and maintain a “wet edge” to ensure a smooth, professional finish. Sanding lightly between coats with fine-grit sandpaper and using a tack cloth to remove dust can also help minimize visible brush strokes.
Q5: Do I need to apply a protective topcoat after painting or staining my cabinets?
A5: Applying a protective topcoat, such as polyurethane or varnish, is essential for stained cabinets to protect the wood and maintain the color. For painted cabinets, it depends on the type of paint you use. High-quality enamel or acrylic paints designed for cabinetry may not require a topcoat, as they already provide a durable, easy-to-clean finish. However, a topcoat can still be beneficial for added protection and longevity.
Q6: How do I properly maintain my refinished kitchen cabinets?
A6: To maintain your refinished cabinets, regularly dust and clean them using a mild detergent mixed with warm water or a specially formulated wood cleaner. Address spills and stains promptly to prevent damage to the finish. Periodically inspect your cabinets for signs of wear or damage and perform touch-ups as needed to maintain the appearance and durability of your cabinets.