
How to Stain Cabinets
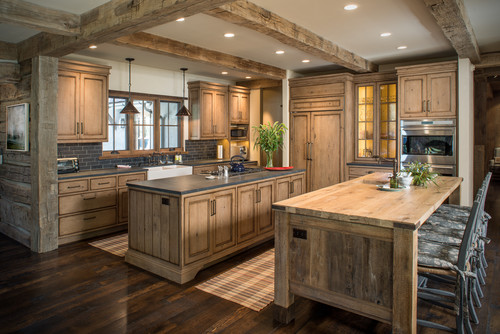
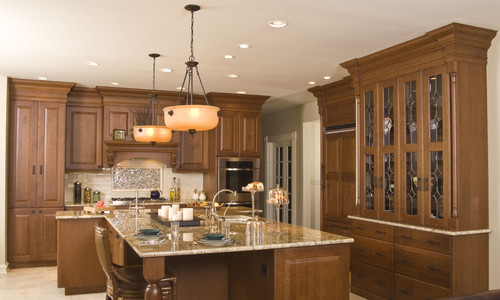
Welcome to our comprehensive guide on how to stain cabinets, a detailed and professional resource to help you achieve stunning results with your staining cabinets project. Whether you’re looking to refresh your current stain or change the color entirely, our guide will walk you through every step of the process, ensuring that you have all the knowledge you need to stain wood kitchen cabinets and other stained wood cabinets in your home.
Preparing Your Workspace and Cabinets for Staining
Before diving into how to stain cabinets, it is crucial to adequately prepare your workspace and the cabinets themselves. By following these detailed and professional steps, you’ll ensure a smooth and successful staining process, leading to beautiful stained wood cabinets.
Clear and Protect the Workspace
The first step in staining cabinets is to create a clean, well-ventilated, and protected workspace. Remove all items from the cabinets and countertops, and cover any surfaces that might be affected by dust or accidental spills during the staining process. Use drop cloths or plastic sheeting to protect your floors, and apply painter’s tape around any areas you want to keep stain-free.
Remove Hardware and Doors
To properly stain wood kitchen cabinets, remove all hardware, including knobs, pulls, and hinges, as well as any drawer fronts and cabinet doors. This will allow for easier access to all surfaces and help ensure a more even application of stain.
Clean the Cabinets
Before staining cabinets, thoroughly clean all surfaces to remove any dirt, grease, or grime that could interfere with the stain’s adherence. Use a mild detergent mixed with warm water and a soft cloth or sponge to clean the cabinet surfaces, and then rinse with clean water. Allow the cabinets to dry completely before proceeding.
Sand the Cabinets
Sanding is a crucial step in preparing cabinets for staining. Start by using a medium-grit sandpaper (around 120-grit) to remove any existing finish and even out the wood’s surface. Then, use a fine-grit sandpaper (around 220-grit) to create a smooth surface that will readily absorb the stain. Be sure to sand in the direction of the wood grain to avoid scratches. Wipe the cabinets with a tack cloth to remove any dust or debris.
Apply Wood Conditioner (Optional)
For certain wood types that are prone to blotchiness when staining, such as pine, birch, or maple, consider applying a wood conditioner before staining cabinets. The conditioner helps to ensure a more even absorption of the stain, resulting in a more consistent finish on your stained wood cabinets. Follow the manufacturer’s instructions for application and drying time.
By carefully preparing your workspace and cabinets, you’re now ready to proceed with the next steps in learning how to stain cabinets. Proper preparation is key to achieving professional-quality results and beautifully stained wood cabinets that will enhance your home.
Choosing the Right Stain for Your Cabinets
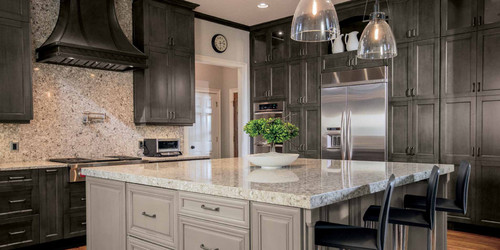
Selecting the right stain for your cabinets is a vital step in learning how to stain cabinets professionally. In this section, we’ll explore the different types of stains available and provide guidance on how to choose the perfect stain for your wood kitchen cabinets, ensuring a stunning result for your staining cabinets project.
Understand the Types of Stains
There are several types of stains available, each with its own characteristics and advantages:
- Oil-based stains: These stains penetrate the wood deeply, providing a rich, durable finish. Oil-based stains are ideal for cabinets made of hardwoods like oak, maple, or cherry, as they enhance the wood grain and provide a long-lasting finish.
- Water-based stains: Water-based stains are eco-friendly, have low odor, and dry quickly. They are an excellent option for softwoods like pine, as they minimize grain raising and provide a consistent finish.
- Gel stains: These stains have a thick consistency, making them perfect for vertical surfaces like cabinet doors. They are suitable for use on a wide range of wood types and are excellent for preventing blotchiness on porous woods.
Consider the Desired Color and Finish
When choosing the right stain for your cabinets, consider the desired color and finish. Keep in mind that the final color of your stained wood cabinets will be influenced by the wood type and its natural color. Test your chosen stain on a sample piece of the same wood type as your cabinets to ensure the desired outcome.
Factor in Durability and Maintenance
Some stains are more durable and require less maintenance than others. For example, oil-based stains provide a long-lasting finish, while water-based stains may require more frequent touch-ups. Consider the level of durability and maintenance you desire when selecting a stain for your cabinets.
Consult Professionals or Seek Recommendations
If you’re unsure about which stain to choose, consult with professionals or seek recommendations from friends, family, or online forums. Their experiences with staining cabinets can provide valuable insights and help you make a more informed decision.
By carefully considering the type of stain, the desired color and finish, and the durability and maintenance requirements, you’ll be well-equipped to select the perfect stain for your cabinets. With the right stain in hand, you’ll be one step closer to achieving the beautiful stained wood cabinets you’ve always envisioned.
Applying the Stain to Your Wood Cabinets
Now that you’ve prepared your workspace, cabinets, and chosen the right stain, it’s time to learn how to apply the stain to your wood kitchen cabinets. This detailed and professional guide will walk you through the process, ensuring that your staining cabinets project results in a consistent and beautiful finish.
Gather the Necessary Tools and Materials
Before beginning the staining process, gather all the tools and materials you’ll need, including:
- The chosen stain
- Gloves
- Safety glasses
- Drop cloths
- Stir sticks
- Clean, lint-free cloths or staining pads
- Foam brushes or natural-bristle brushes
Stir the Stain Thoroughly
Stir the stain well using a stir stick to ensure even color distribution and consistency. Continue stirring periodically throughout the staining process to maintain uniformity.
Apply the Stain in Thin, Even Coats
When staining cabinets, apply the stain in thin, even coats to ensure a consistent and professional finish. Using a foam brush or natural-bristle brush, apply the stain along the wood grain, starting with the inner cabinet surfaces and working your way outward. For intricate areas, use a smaller brush or staining pad to ensure full coverage.
Wipe Off Excess Stain
After applying the stain, wait a few minutes to allow the wood to absorb the stain (check the manufacturer’s recommendations for the specific wait time). Then, using a clean, lint-free cloth, gently wipe off any excess stain, following the direction of the wood grain. This will help to prevent streaks and uneven coloration on your stained wood cabinets.
Allow the Stain to Dry
Allow the stain to dry according to the manufacturer’s instructions. Drying times can vary depending on the type of stain, the wood type, and environmental conditions like humidity and temperature. Ensure the stain is completely dry before assessing the color and deciding whether additional coats are needed.
Apply Additional Coats as Needed
If you desire a deeper or darker color, apply additional coats of stain following the same process outlined in steps 3.3-3.5. Allow each coat to dry completely before applying the next one.
By carefully following these detailed steps on how to stain cabinets, you’ll ensure a smooth, even, and professional finish for your wood kitchen cabinets. With patience and precision, your staining cabinets project will result in stunning stained wood cabinets that enhance the overall aesthetic of your space.
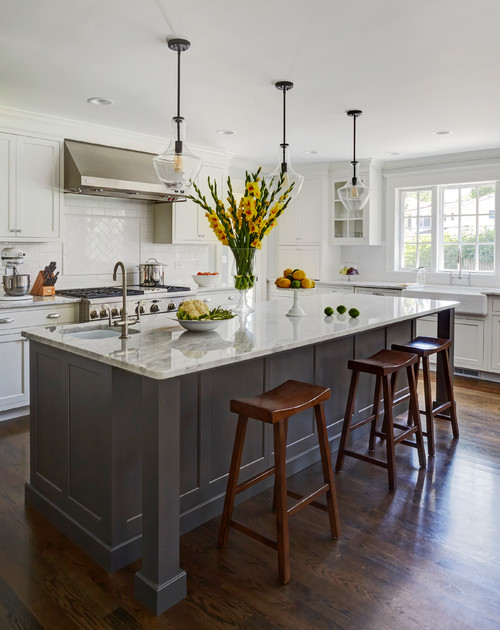
Sealing and Protecting Your Stained Wood Cabinets
After successfully applying the stain to your cabinets, the final step in learning how to stain cabinets is sealing and protecting the finish. In this detailed and professional guide, we’ll discuss the various types of sealants available, their benefits, and how to apply them to your stained wood cabinets, ensuring long-lasting protection and beauty.
Choose the Right Sealant
There are several types of sealants to choose from when sealing your stained wood cabinets, each with its own advantages:
- Polyurethane: This is a popular choice due to its durability and resistance to water, heat, and chemicals. It is available in both oil-based and water-based forms, as well as various sheens, including matte, satin, semi-gloss, and gloss.
- Varnish: This traditional sealant offers good protection and is available in various sheens. However, it may yellow over time and is less resistant to heat and chemicals compared to polyurethane.
- Lacquer: This fast-drying sealant provides a durable and smooth finish. It is easy to apply, but may require more frequent touch-ups and maintenance compared to other sealants.
Prepare the Cabinets for Sealing
Before applying the sealant, ensure that the stain is completely dry and the cabinets are clean and free of dust or debris. Lightly sand the stained surfaces with a fine-grit sandpaper (around 220-grit) to create a smooth surface for the sealant to adhere to, and then wipe the cabinets with a tack cloth to remove any dust.
Apply the Sealant
Follow the manufacturer’s instructions for the chosen sealant when applying it to your stained wood cabinets. Typically, you will use a high-quality brush or foam applicator, applying thin, even coats in the direction of the wood grain. Make sure to cover all surfaces, including corners and edges, to ensure proper protection.
Allow the Sealant to Dry and Cure
Allow the sealant to dry according to the manufacturer’s recommendations. Drying times can vary depending on the type of sealant, environmental conditions, and the number of coats applied. It is crucial to let the sealant cure fully before reassembling and using your cabinets, as this will ensure maximum protection and durability.
Apply Additional Coats for Increased Protection
For added protection and a more durable finish, consider applying multiple coats of sealant, allowing each coat to dry completely before applying the next one. Lightly sand between coats with fine-grit sandpaper and wipe with a tack cloth to ensure a smooth finish.
By following these detailed and professional steps, you’ll effectively seal and protect your stained wood cabinets, ensuring their beauty and durability for years to come. With proper sealing, your staining cabinets project will result in a stunning and long-lasting finish that enhances your home’s aesthetic.
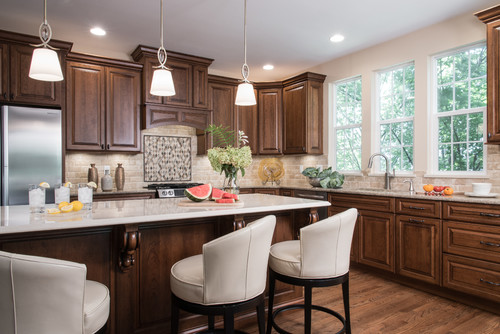
Troubleshooting Common Staining Issues
When learning how to stain cabinets, you may encounter some challenges along the way. In this detailed and professional guide, we’ll address common issues that can arise during the staining process, offering helpful tips and solutions to ensure a flawless finish for your stained wood cabinets.
Uneven Stain Application
Issue: The stain appears uneven or blotchy on the cabinet surfaces.
Solution: To avoid uneven stain application, ensure that the cabinets are properly sanded and cleaned before staining. Apply the stain in thin, even coats, and wipe off any excess with a clean, lint-free cloth. For woods prone to blotchiness, like pine, maple, or birch, consider using a wood conditioner before staining.
Drying Problems
Issue: The stain is taking longer to dry than expected, or it remains tacky even after the recommended drying time.
Solution: Environmental factors, such as humidity and temperature, can affect drying times. Ensure proper ventilation and consider using a dehumidifier or fan to help speed up the drying process. Also, double-check that you’re using thin, even coats of stain, as thicker coats can take longer to dry.
Bubbles or Dust in the Finish
Issue: Bubbles or dust particles are visible in the finish after applying the sealant.
Solution: To prevent bubbles, use a high-quality brush or foam applicator and apply the sealant with long, even strokes, avoiding excessive brushing. For dust, ensure the workspace is clean and free of debris, and use a tack cloth to wipe the cabinets before applying the sealant.
Stain Not Adhering to the Wood
Issue: The stain is not adhering to the wood, leaving certain areas looking patchy or uncolored.
Solution: Make sure the cabinets are thoroughly cleaned and sanded before staining. Old finishes, dirt, or grease can interfere with stain adherence. If you’re working with previously painted or sealed cabinets, you may need to use a chemical stripper to remove the old finish before staining.
Difficulty Matching Stain Colors
Issue: The stain color on the cabinets does not match the desired color or is inconsistent across different sections.
Solution: When staining cabinets, always test the stain on a sample piece of the same wood type as your cabinets to ensure the desired color. Keep in mind that different wood types and even individual boards can absorb the stain differently, affecting the final color. To minimize variations, mix stains from different cans to ensure a consistent color, and consider using a wood conditioner on blotch-prone woods.
By understanding these common staining issues and their solutions, you’ll be well-equipped to tackle any challenges that may arise during your staining cabinets project. With these troubleshooting tips in hand, you’ll be able to achieve the perfect finish for your stained wood cabinets, enhancing your kitchen’s beauty and functionality.
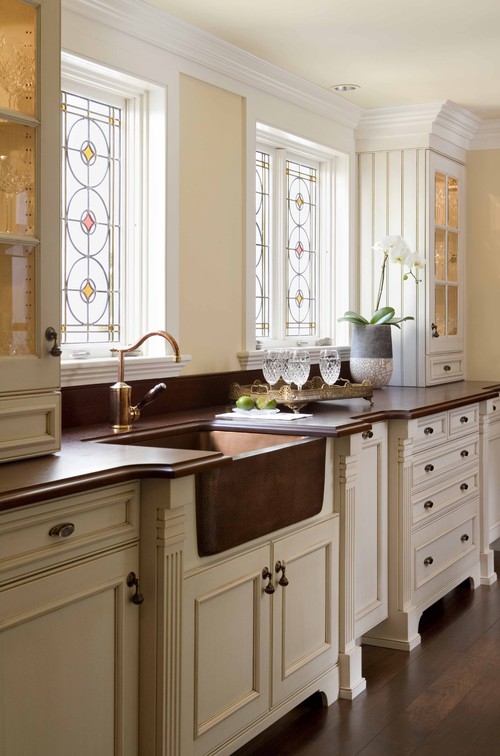
Choosing the Right Hardware and Accessories for Your Stained Wood Cabinets
Once you’ve mastered how to stain cabinets and have successfully completed the staining process, it’s time to focus on the finishing touches that will make your wood kitchen cabinets stand out. In this detailed and professional guide, we’ll discuss how to choose the perfect hardware and accessories to complement your stained wood cabinets, ensuring a cohesive and beautiful look.
Consider the Style of Your Cabinets
When selecting hardware and accessories for your stained wood cabinets, keep in mind the overall style of your kitchen and cabinets. Classic or traditional cabinets may pair well with ornate, antique-inspired hardware, while modern or minimalist cabinets often look best with sleek, contemporary hardware designs.
Choose a Suitable Finish
The finish of your hardware should complement the stain color and overall aesthetic of your kitchen. Some popular finishes include:
- Polished or brushed nickel: These versatile finishes work well with a wide range of cabinet stain colors and styles.
- Oil-rubbed bronze or black: These finishes offer a bold contrast against lighter stained wood cabinets, enhancing a traditional or rustic aesthetic.
- Brass or gold: These finishes add warmth and elegance to your cabinets, making them ideal for both traditional and contemporary kitchens.
Factor in Functionality and Comfort
When choosing hardware for your stained wood cabinets, consider not only the appearance but also the functionality and comfort. Select knobs and pulls that are comfortable to grip and easy to use, and consider soft-close hinges and drawer slides for added convenience and longevity.
Coordinate with Other Kitchen Elements
To achieve a cohesive look in your kitchen, coordinate your cabinet hardware with other elements in the space, such as faucets, light fixtures, and appliances. This will help to create a harmonious and professionally designed appearance.
Don’t Forget About Storage Solutions and Accessories
Beyond hardware, consider adding practical storage solutions and accessories to your cabinets, such as pull-out shelves, spice racks, or drawer organizers. These functional additions can enhance the usability of your cabinets and help to keep your kitchen organized and efficient.
By carefully selecting the right hardware and accessories for your stained wood cabinets, you’ll create a polished and well-designed space that reflects your personal style and meets your functional needs. With the perfect finishing touches in place, your staining cabinets project will result in a beautifully updated kitchen that you’ll be proud to show off.
Understanding Different Wood Types and Their Impact on Staining
When learning how to stain cabinets, it’s essential to understand how different wood types can impact the staining process and final result. In this detailed and professional guide, we’ll discuss the characteristics of various wood types and how they can affect your staining cabinets project, helping you make informed decisions when selecting wood and stain for your wood kitchen cabinets.
Hardwoods
Hardwoods are often used for cabinets due to their durability and attractive grain patterns. Some popular hardwoods include:
- Oak: Known for its prominent grain pattern and excellent stain absorption, oak is a popular choice for traditional and rustic kitchens. It takes stain well, and its open grain pattern can create a visually appealing texture on your stained wood cabinets.
- Maple: Maple is a dense wood with a subtle, straight grain pattern. Due to its tight grain, it can be prone to blotchiness when staining. Using a wood conditioner before staining can help achieve a more even finish.
- Cherry: Cherry is a sought-after hardwood for its rich, warm tones and fine grain. It tends to darken naturally over time, which can enhance the color and depth of your stained wood cabinets.
Softwoods
Softwoods, such as pine, are less common for cabinetry but can still be used to create a unique look.
- Pine: Pine is a budget-friendly option with a distinctive grain pattern and knots. It’s prone to dents and scratches, but its rustic appearance can be enhanced by the right stain. Pine is also susceptible to blotchiness, so using a wood conditioner before staining is recommended.
Engineered Woods
Engineered woods, like plywood and medium-density fiberboard (MDF), are often used for cabinet construction due to their affordability and stability.
- Plywood: Plywood is constructed from layers of wood veneer glued together. It’s a stable and cost-effective option that can be stained, but the final appearance may not be as uniform as solid wood.
- MDF: MDF is composed of wood fibers and resin, making it smooth and uniform, but not suitable for staining. It’s typically used for painted cabinets rather than stained wood cabinets.
Considerations When Staining Different Wood Types
When staining cabinets, keep these factors in mind:
- Test the stain on a sample piece of the same wood type as your cabinets to ensure the desired color and finish.
- Use a wood conditioner on blotch-prone woods like maple and pine to achieve a more consistent finish.
- Be prepared for variations in color and grain pattern, even within the same wood type, as individual boards can absorb stain differently.
By understanding how different wood types can impact the staining process, you’ll be better equipped to make informed decisions when selecting wood and stain for your cabinets. With this knowledge, you can achieve the beautiful stained wood cabinets you’ve always envisioned, enhancing the overall aesthetic of your kitchen.
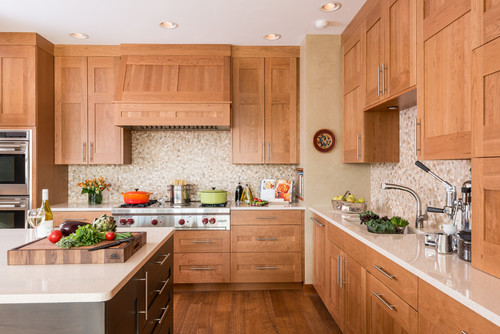
Advanced Staining Techniques for a Custom Look
After mastering the basics of how to stain cabinets, you may want to explore advanced staining techniques to create a more personalized and unique look for your wood kitchen cabinets. In this detailed and professional guide, we’ll discuss several advanced techniques to help you achieve a custom finish for your stained wood cabinets, setting your kitchen apart from the rest.
Glazing
Glazing involves applying a thin layer of translucent tinted glaze over your stained wood cabinets to enhance the color and depth of the finish. This technique can create an antique or distressed appearance, adding character and visual interest to your cabinets.
Distressing
Distressing is a technique used to create an aged, worn look on your stained wood cabinets. This can be achieved by strategically sanding or using tools to create nicks, dents, or scratches in the wood before staining. This technique adds charm and a sense of history to your cabinets, especially when paired with a contrasting stain or glaze.
Two-Tone Staining
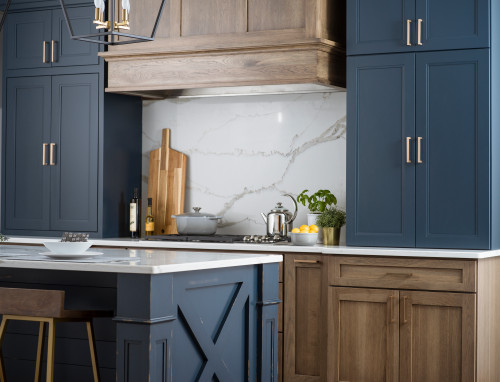
Two-tone staining involves applying different stain colors to specific areas of your cabinets, such as using a darker stain on the cabinet frames and a lighter stain on the doors and drawer fronts. This technique adds visual contrast and can help to emphasize specific design elements or architectural features in your kitchen.
Layering Stains
Layering stains is a technique that involves applying multiple layers of different stain colors to achieve a more complex and unique finish. This can be done by applying a base stain color, allowing it to dry, and then applying a second stain color on top, wiping away the excess to reveal the base color underneath. Experimenting with different stain combinations can result in one-of-a-kind finishes that truly make your cabinets stand out.
Faux Wood Grain
If you’re working with engineered wood or other materials that don’t have a natural wood grain, you can create a faux wood grain effect using specialized tools and techniques. This involves applying a base stain color, then using a wood grain rocker, comb, or graining tool to create the appearance of natural wood grain on your cabinets.
When attempting advanced staining techniques, it’s essential to practice on sample boards or scrap pieces of wood first to ensure you achieve the desired effect. By incorporating these advanced techniques, you can create a custom and unique finish for your stained wood cabinets, truly transforming the look of your kitchen.
Alternative Cabinet Finishing Options
While learning how to stain cabinets is an excellent skill to have, it’s also important to consider alternative finishing options for your wood kitchen cabinets. In this detailed and professional guide, we’ll explore some popular alternatives to staining cabinets, helping you make the best decision for your kitchen’s aesthetic and functionality.
Painted Cabinets
Painting your cabinets is a popular alternative to stained wood cabinets. It offers a wide variety of color options, allowing you to match your cabinets to virtually any design theme or color palette. Painted cabinets can also provide a smooth, uniform finish, making them suitable for engineered wood materials like MDF or plywood.
Whitewashing
Whitewashing is a technique that involves applying a thin layer of diluted white paint to the cabinets, allowing some of the wood grain to show through. This creates a soft, weathered look that can add a touch of charm and lightness to your kitchen. Whitewashing works best on cabinets made from woods with prominent grain patterns, like oak or ash.
Lacquered Cabinets
Lacquer is a durable, high-gloss finish that can be applied to cabinets to create a sleek, modern look. Lacquered cabinets are known for their smooth, reflective surfaces, which can add a touch of glamour and sophistication to your kitchen. While lacquer finishes are typically clear, they can also be tinted in various colors to suit your design preferences.
Stain-and-Clear Finish
For those who appreciate the natural beauty of wood but want added protection, a stain-and-clear finish might be the ideal choice. This involves staining the cabinets with your chosen color, then applying a clear protective topcoat, such as polyurethane or lacquer. This provides the wood with a durable, long-lasting finish while allowing the wood grain and stain color to shine through.
Unfinished or Natural Wood
If you prefer a more rustic or organic look, leaving your cabinets unfinished or simply applying a clear protective sealant can showcase the natural beauty of the wood. This option works well in kitchens with a farmhouse or minimalist design aesthetic, and it allows the unique characteristics of the wood to take center stage.
By considering these alternative cabinet finishing options, you can make an informed decision about which finish best suits your kitchen design and personal preferences. Whether you choose stained wood cabinets, painted cabinets, or any of the other options mentioned above, a beautifully finished set of cabinets can make a significant impact on your kitchen’s overall appearance and functionality.
Conclusion
Understanding how to stain cabinets and exploring alternative finishing options are essential skills for transforming your wood kitchen cabinets. From proper preparation and staining techniques to advanced methods and alternative finishes, this comprehensive guide has provided you with the knowledge and tools to make informed decisions and achieve professional results.
When choosing the right finish for your cabinets, consider factors such as your kitchen’s design aesthetic, the type of wood, and your personal preferences. Whether you opt for stained wood cabinets or another finishing option, the key to success is patience, attention to detail, and practice.
Remember that enhancing your kitchen with beautifully finished cabinets not only elevates its appearance but also adds value to your home. By investing time and effort into refinishing your cabinets, you’ll create a welcoming and functional space that you and your family can enjoy for years to come.
Frequently Asked Questions (FAQs) about Staining Cabinets
- How long does it take to stain cabinets?
- The time it takes to stain cabinets depends on several factors, such as the size of your kitchen, the type of wood, and the complexity of the project. On average, staining cabinets can take anywhere from two to five days, including prep work, staining, and drying time.
- Can you stain over existing stained cabinets?
- Yes, it’s possible to stain over existing stained cabinets. However, it’s essential to thoroughly sand and strip the old stain to ensure that the new stain adheres properly and achieves the desired color and finish.
- Can you change the color of stained cabinets?
- Yes, it’s possible to change the color of stained cabinets by applying a new stain color. Keep in mind that the existing stain color and type of wood can impact the final result, so it’s essential to test the new stain color on a sample piece of wood first.
- Do you need to seal stained cabinets?
- Yes, sealing stained cabinets is crucial to protect the wood and enhance the durability of the finish. Applying a clear protective topcoat, such as polyurethane or lacquer, can provide added protection and extend the life of your stained wood cabinets.
- Can I paint over stained cabinets?
- Yes, you can paint over stained cabinets. However, it’s essential to properly prepare the cabinets by sanding, priming, and cleaning to ensure that the paint adheres properly and achieves a smooth, even finish.
- How often should I stain my cabinets?
- The frequency of staining cabinets depends on several factors, such as the type of wood, wear and tear, and exposure to sunlight. As a general rule, it’s recommended to restain your cabinets every 5-10 years to maintain their appearance and protect the wood.
- Can I stain cabinets without sanding?
- While sanding is a crucial step in preparing wood for staining, it’s possible to skip or minimize sanding by using a wood conditioner or pre-stain wood conditioner. This can help to achieve a more even stain application and prevent blotchiness on blot-prone woods like maple and pine.
- How can I fix blotchy stain on my cabinets?
- If you notice blotchiness in your stain, you can try using a wood conditioner or sanding and re-staining the affected areas. Applying a second coat of stain can also help to even out the finish. In some cases, you may need to strip and start the staining process over.
- What tools do I need to stain cabinets?
- To stain cabinets, you’ll need several tools, including a sander or sandpaper, wood conditioner, stain, brushes, rags, and a clear protective topcoat. Optional tools include a wood-graining tool, wood filler, and masking tape.
- Can I hire a professional to stain my cabinets?
- Yes, you can hire a professional to stain your cabinets. While staining cabinets can be a DIY project, it requires a lot of time, effort, and attention to detail. Hiring a professional can ensure that the job is done correctly and efficiently, saving you time and frustration in the long run.


